If you’re looking to master one of War Thunder’s most versatile light attack jets, you’ve come to the right place. The Soan 105, based on the real-world Saab 105, offers a unique blend of agility and firepower that can make it a formidable opponent in the right hands. In this guide, I’ll walk you through everything you need to know about flying this Swedish marvel, from basic controls to advanced combat maneuvers.
Historical Background
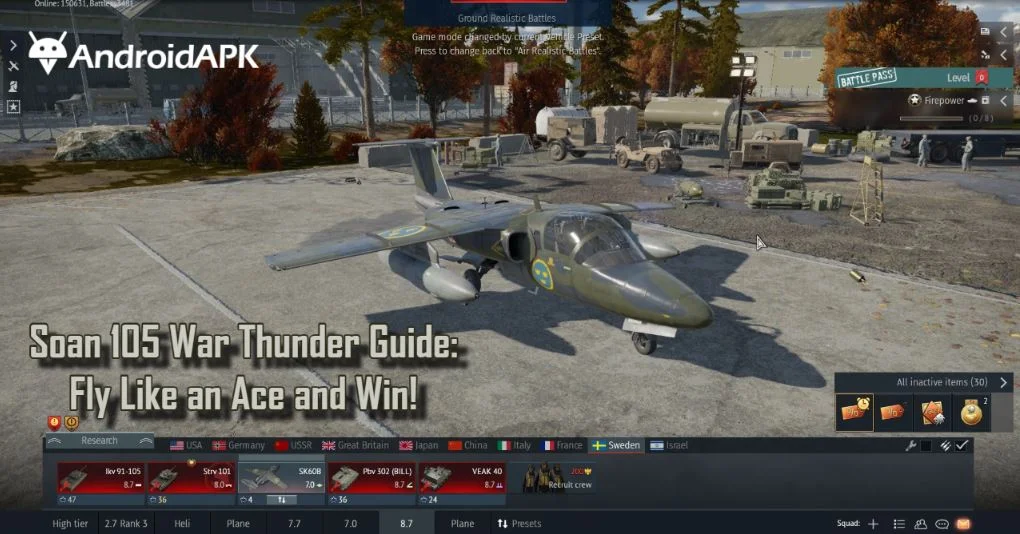
The Saab 105, known in War Thunder as the Soan 105, represents Sweden’s approach to creating a multi-role aircraft capable of both training and light attack duties. When you first encounter this aircraft, you might notice it’s distinctive twin-engine design and compact airframe. Originally developed in the 1960s, the Saab 105 served primarily as an advanced trainer and light attack aircraft for the Swedish Air Force. In War Thunder, this historical background translates into a vehicle that perfectly bridges the gap between pure trainers and dedicated combat aircraft.
Technical Specifications
Let me break down the key specifications that make the Soan 105 special in War Thunder. The aircraft features two turbojet engines that provide reliable thrust, allowing you to maintain speeds competitive with other aircraft in it’s battle rating. You’ll find that the Soan 105 has a decent climb rate, which proves invaluable when you need to gain altitude quickly during combat situations. The aircraft’s relatively light weight contributes to it’s impressive maneuverability, though you’ll need to manage your energy carefully to make the most of these characteristics.
Role in War Thunder
In War Thunder’s diverse ecosystem of aircraft, the Soan 105 occupies a unique niche. When flying this aircraft, you’ll discover it’s strength lies in it’s versatility. I’ve found that it excels as both a support fighter and a light attack aircraft, making it particularly valuable in mixed battles where flexibility is key. You can effectively engage both air and ground targets, though success requires understanding the aircraft’s limitations. The Soan 105’s battle rating places it in an interesting position where it regularly encounters both late-prop aircraft and early jets, requiring you to adapt your tactics based on your opponents.
Getting Started with the Soan 105
When you first climb into the cockpit of the Soan 105, you’ll want to familiarize yourself with it’s unique handling characteristics. As your guide, I’m going to walk you through the important aspects of mastering this aircraft’s controls and optimizing it’s performance through modifications and crew skills. Let’s get into the details that will help you get the most out of this versatile jet.
How to Fly the Soan 105 Effectively?
Flying the Soan 105 is all about understanding it’s strengths and playing to them. If you jump into battles thinking you can take on everything head-on, you’re in for a rough time. But if you use smart tactics, you’ll be a serious threat in the skies.
Basic Flight Maneuvers
- Energy Retention: Keep your speed up by climbing before engagements.
- Boom and Zoom: Dive on enemies, fire and climb back up.
- Rolling Scissors: Use quick rolls to evade enemy fire.
- Defensive Flying: If chased, use sharp turns and altitude changes.
By mastering these techniques, you’ll stay alive longer and be more effective in combat.
Basic Controls and Handling
The Soan 105 responds differently from many other aircraft you might be familiar with in War Thunder. I’ve found that it’s twin-engine configuration provides excellent stability during level flight, but you’ll need to be mindful of your speed management. The aircraft performs best between 500-700 km/h, where you’ll have optimal control response and maneuverability. When flying at lower speeds, be careful with your control inputs, as the aircraft can become sluggish. At higher speeds, the controls tighten up considerably, requiring more subtle adjustments to avoid overshooting your target.
Initial Setup and Modifications
Your journey to mastering the Soan 105 begins with choosing the right modifications. Here’s my recommended upgrade path based on extensive testing:
- Focus first on “Flight Performance” upgrades:
- Compressor
- Engine
- Wings repair
- Airframe
- Then move on to “Weaponry” improvements:
- New 20mm cannons
- Offensive 20mm belts
- New boosters
- Rocket modifications
This upgrade path ensures you’ll have a solid performance foundation before improving your offensive capabilities. The improved engine performance and maneuverability will help you survive longer in battles, giving you more opportunities to earn research points for further upgrades.
Crew Skills and Training
Don’t overlook the importance of crew skills in maximizing your Soan 105’s potential. Based on my experience, here are the most crucial crew skills to focus on:
- Stamina and G-Tolerance: These skills are important for maintaining control during tight maneuvers and extended dogfights. I recommend getting these to at least level 3 before moving on to other skills.
- Awareness and Keen Vision: The Soan 105’s role often requires you to spot targets at various ranges. Enhanced awareness helps you detect threats earlier and react accordingly.
- Weapon Maintenance: This skill becomes particularly important once you’ve unlocked additional weaponry, helping to prevent jams and improve overall accuracy.
Combat Tactics and Strategy
Now that we’ve covered the basics, let’s get into the meat of combat operations with the Soan 105. Your success in battle will largely depend on understanding and applying effective combat techniques while being mindful of the aircraft’s strengths and limitations.
Air-to-Air Combat Techniques
When engaging enemy aircraft in the Soan 105, energy management becomes your primary concern. Unlike some pure fighters, you’ll need to be more strategic about when and how you engage. Here’s what I’ve found works best:
- Initial Engagement: Start by gaining altitude advantage whenever possible. The Soan 105 performs best when you have energy to spare, allowing you to dictate the terms of engagement. I typically climb at a 15-degree angle while maintaining 280-300 km/h indicated airspeed.
- Combat Maneuvers: Use your decent turn rate to your advantage, but avoid extended turnfights with more agile aircraft. Instead, focus on boom-and-zoom tactics when possible, using your good energy retention to maintain an advantage over your opponents.
Ground Attack Capabilities
The Soan 105 truly shines in it’s ground attack role. With it’s diverse weapon loadout options and stable flight characteristics, you’ll find yourself becoming a significant threat to ground targets. I’ve spent countless hours perfecting ground attack runs and here’s what I’ve learned works best.
Your primary approach should focus on maintaining a safe altitude of around 2,000-3,000 meters while scanning for targets. When engaging ground targets, I recommend approaching at a 30-45 degree angle, which provides the optimal balance between accuracy and survivability. Remember to keep your speed above 450 km/h during attack runs to maintain the ability to escape quickly if enemy fighters appear.
Defensive Maneuvers
Survival in the Soan 105 often depends on your ability to evade threats effectively. The aircraft’s moderate size and good roll rate make it capable of performing several key defensive maneuvers. When under attack from enemy aircraft, your first priority should be to break their line of sight while maintaining energy.
One of the most effective defensive techniques I’ve developed is the rolling scissors maneuver, which takes advantage of the Soan 105’s good roll rate and moderate turn capability. If an enemy is on your tail, initiate a rolling motion while gradually bleeding speed. This forces your pursuer to overshoot or abandon their attack run.
Weapon Systems and Loadouts
Understanding your weapon systems is crucial for maximizing the Soan 105’s combat effectiveness. Let’s explore the various armament options and how to use them effectively in different combat scenarios.
Primary Armament Options
The Soan 105’s primary weapons consist of two 20mm automatic cannons. These guns offer a good balance of rate of fire and hitting power, making them effective against both air and light ground targets. When engaging air targets, I’ve found that the most effective approach is to use short bursts of 1-2 seconds. This conserves ammunition while maintaining accuracy.
The default ammunition belt provides decent performance, but I strongly recommend researching the improved belts as soon as possible. The “Air Targets” belt significantly increases your effectiveness in air-to-air combat, while the “Ground Targets” belt proves invaluable for attacking light armored vehicles.
Secondary Weapons
Your secondary weapon options include various rockets and bombs, making the Soan 105 a versatile platform for different mission types. The rocket loadout options deserve special attention, as they can be particularly effective when used correctly. The 75mm rockets, while requiring more precise aim, offer excellent penetration against armored targets.
When carrying bombs, remember that they significantly affect your aircraft’s handling. I typically avoid carrying the maximum bomb load unless absolutely necessary, as it severely impacts your ability to defend yourself against enemy fighters.
Optimal Loadout Configurations
Let me share my tested loadout configurations that work best for different mission types in War Thunder. Understanding these setups will help you maximize the Soan 105’s effectiveness in various combat scenarios.
For Air Superiority:
- 2x 20mm cannons with Air Target belts
- Minimum fuel load
- No external ordinance
This configuration gives you the best possible power-to-weight ratio and maneuverability. I’ve found that carrying minimal fuel and no external stores allows you to compete more effectively with dedicated fighters, though you’ll need to be mindful of your fuel consumption.
Advanced Combat Scenarios
Now that we’ve covered the fundamentals, let’s explore how to handle more complex combat situations. Your success in these scenarios often depends on proper positioning and tactical awareness.
Team Battle Strategies
In team battles, the Soan 105 excels as a support fighter. Your role should focus on assisting teammates while maintaining situational awareness. I’ve found that staying slightly behind and above the main engagement area allows you to identify and exploit opportunities as they arise.
When supporting teammates, communicate your intentions clearly and try to coordinate attacks. A well-timed distraction from your position can often give your team the advantage they need to secure a kill. Remember to maintain enough energy to disengage if the situation becomes unfavorable.
Solo Combat Tips
When flying solo, the Soan 105 requires a more cautious approach. Your survival depends on careful target selection and maintaining energy advantage. Here’s my proven strategy for solo operations:
- Maintain altitude advantage whenever possible
- Choose engagements carefully – avoid multiple opponents
- Keep an escape route planned at all times
- Use terrain masking when attacking ground targets
- Never commit to extended dogfights unless absolutely necessary
Map-Specific Tactics
Different maps require different approaches to maximize your effectiveness in the Soan 105. On maps with varied terrain, use the landscape to your advantage by flying low and using hills as cover. In more open maps, focus on maintaining higher altitude and using cloud cover when available.
Conclusion
Mastering the Soan 105 in War Thunder requires patience, practice and a good understanding of it’s capabilities and limitations. Through this guide, I’ve shared my experience and strategies that have proven successful in combat. Remember that every engagement is unique and adaptability is key to success.
Frequently Asked Questions
The optimal combat altitude is between 2,000-4,000 meters, providing a good balance between performance and tactical options.
Avoid head-ons when possible, but if necessary, fire a short burst from 1km and break away at 0.7km.
Focus on flight performance upgrades (engine, compressor) before moving to weaponry improvements.
Yes, but you need to play to it’s strengths – energy fighting and boom-and-zoom tactics rather than turnfighting.
Approach at a 30-45 degree angle, maintain speed above 450 km/h and use terrain masking when possible.